
A Soil Block Soil Recipe
Within which I proffer a list of the necessary big box store ingredients to create soil blocks in which to hopefully grow beautiful and healthy plant babies if you work really hard and don’t neglect them like I did.
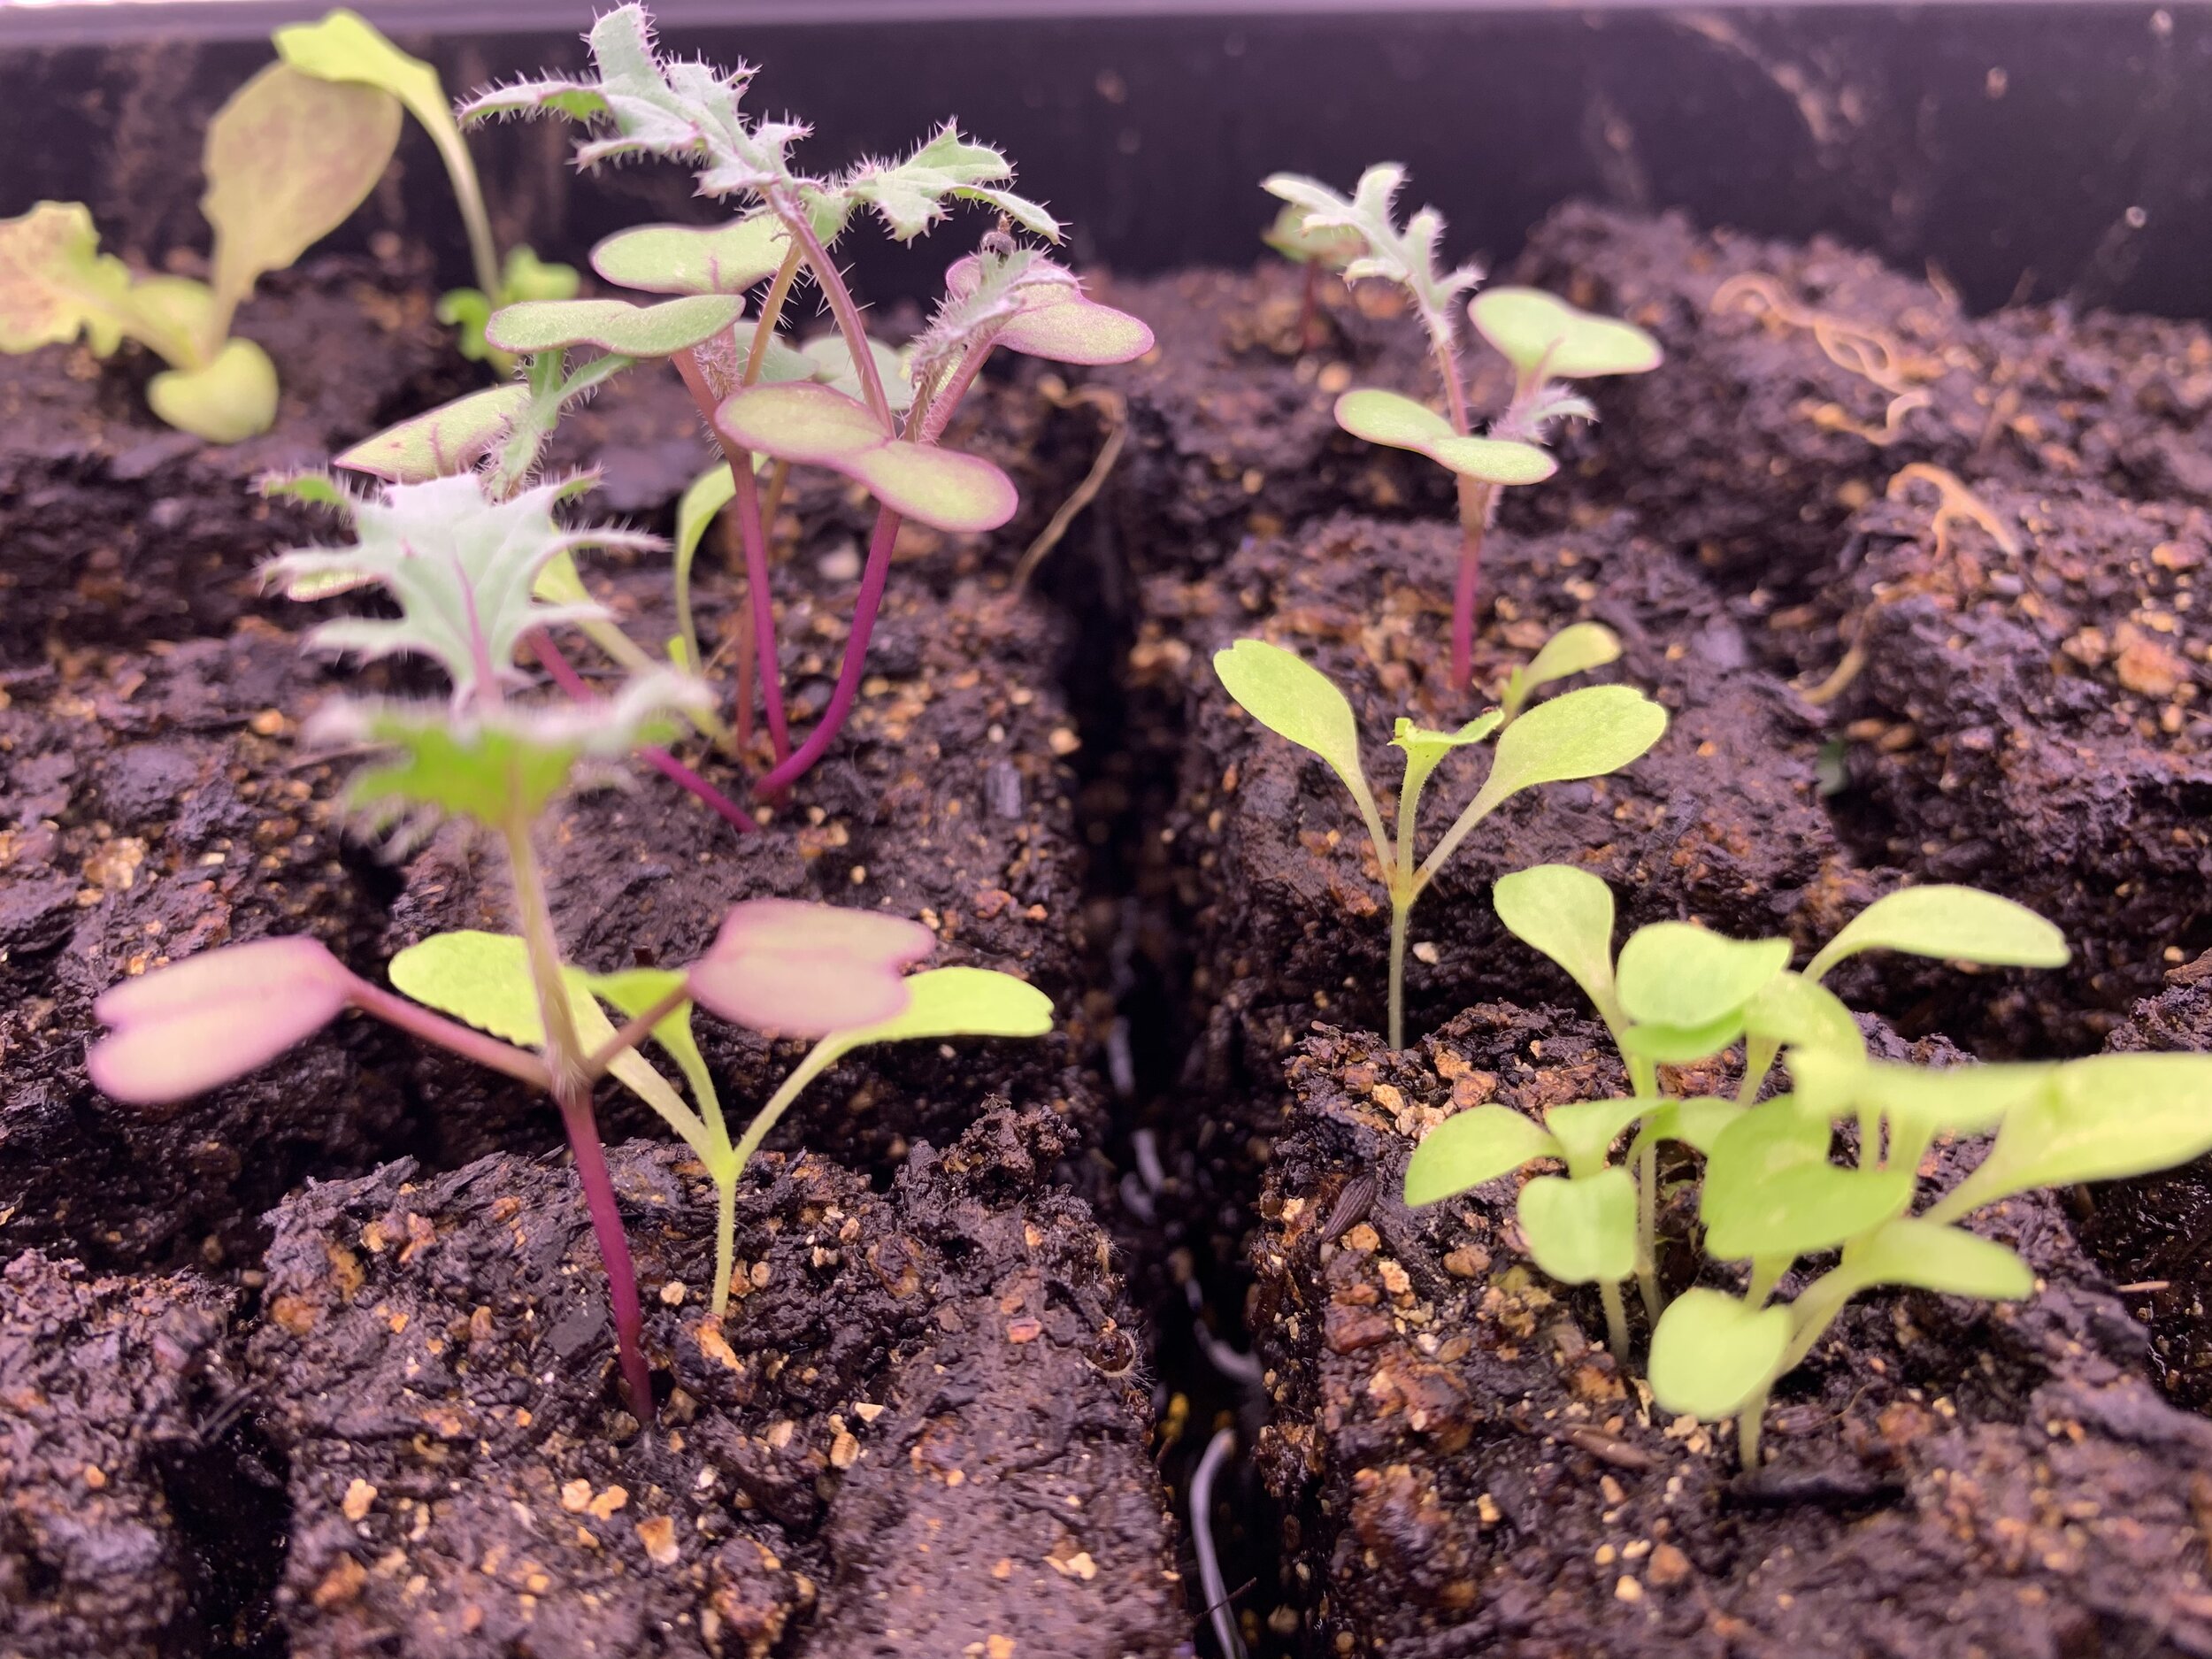
Yep, pretty sure that’s lettuce you see growing together with kale. See the lessons I learned from this project below for why.
I’ve found many versions of the popular Eliot Coleman soil recipe.

Here is Eliot Coleman’s original recipe from Johnny’s Seeds. Notice this makes 2 bushels. I don’t even need 1/2 a bushel! As noted at the bottom, there are products you can buy and have shipped to your door from which you can make soil blocks right out of the bag. I won’t judge you if you go that route. I may even end up going that route but let’s see shall we?
I’ve never attempted to grow seedlings in soil blocks but over the last couple of years (yes, years) I’ve been gathering all the necessary items for making them. Sometimes it takes me a while to get where I’m going.
(I have grown seedlings in little plastic trays for a few years with mixed results. I’ve got the right spot and the lights I need. I’m not going to go into those details right now but let me know if you need any of that info.)
A couple of years ago I procured two sizes of soil block makers from Johnny’s, the Hand Held 20 and the Hand Held 5 . They will neatly compress the soil into a block that holds itself up, avoiding the need for those flimsy plastic cells that get thrown away every season. The idea is to start seeds in the tiny blocks from the 20 and once they get a good start place them into the larger blocks made by the 5. I made some then but without much confidence and zero success. It was half-hearted at best.

The soil block itself is an ingenious way to create stronger seedlings by encouraging air pruning and avoiding a root bound plant. An air pruned plant’s roots are just waiting to explore in more soil so when it gets transplanted they are ready to rock and roll. Root bound roots are limited by the container it was started in and may have a bit more trouble getting started in the garden and take longer to harden off.
Last year I finally broke down and bought some heavy duty seeding trays from Bootstrap Farmer. They are infinitely better than the typical ones you get free with a tray of seedlings. I’ve tried reusing old seed trays and I’ve typically gotten another season, or maybe two out of a tray but then they start falling apart. If I’m going to use plastic then I want to be able to re-use it. Single use plastics are a scourge and need to stop. I could go on but will save that rant for later.
My yard isn’t large but I do try to garden fairly intensively. I don’t need a whole lot of soil blocks to get me going (definitely not 2 bushels worth) and I don’t want to buy ingredients in bulk. Additionally, the ingredients they suggest picking up out of the yard, namely garden soil and compost, were frozen solid when I was ready to get started. I needed to have a quick and easy plan to get the necessary ingredients and in a pinch and, like it or not, the big box hardware store fit the bill. Since I actually bought the ingredients in the fall it would be wise to think ahead in case these items aren’t available off the shelf in the middle of winter.
So, thinking ahead, last September I went digging around that big box retailer (Lowe’s in this case) to see if I could find what I needed right off the shelf. The stuff I’d need to make my garden grow next spring.
Here’s what I found:

Scott’s (Premium) Topsoil. .75 cubic feed advertised as “Lawn & Garden Soil Conditioner” that “Adds Organic Matter & Sphagnum Peat Moss to Existing Soil”. So not to be used in pots but rather as a soil amendment. Well, even though it lives in a plastic bag and doesn’t have the same qualities and living organisms as “garden soil” it has some of the desired qualities. I’ll be adding other stuff that will hopefully bring in some good buggers. Plus it’s only $2.48 a bag
I added 4 parts of this to my mix. I also found that this didn’t need much screening. The large-ish things I found could be picked out by hand.

Evergreen Compost and Manure. 1 cubic foot of organic matter for $3.98 a bag. Not bad. Should make up for lack of homegrown compost that’s sitting under a pile of snow and ice right now.
I added 3 parts of this to my mix. This was also very fine and didn’t need to be screened. I broke up what looked like some cow turd balls but it wasn’t gross at all. Not at all. At least it didn’t smell like cow turds.
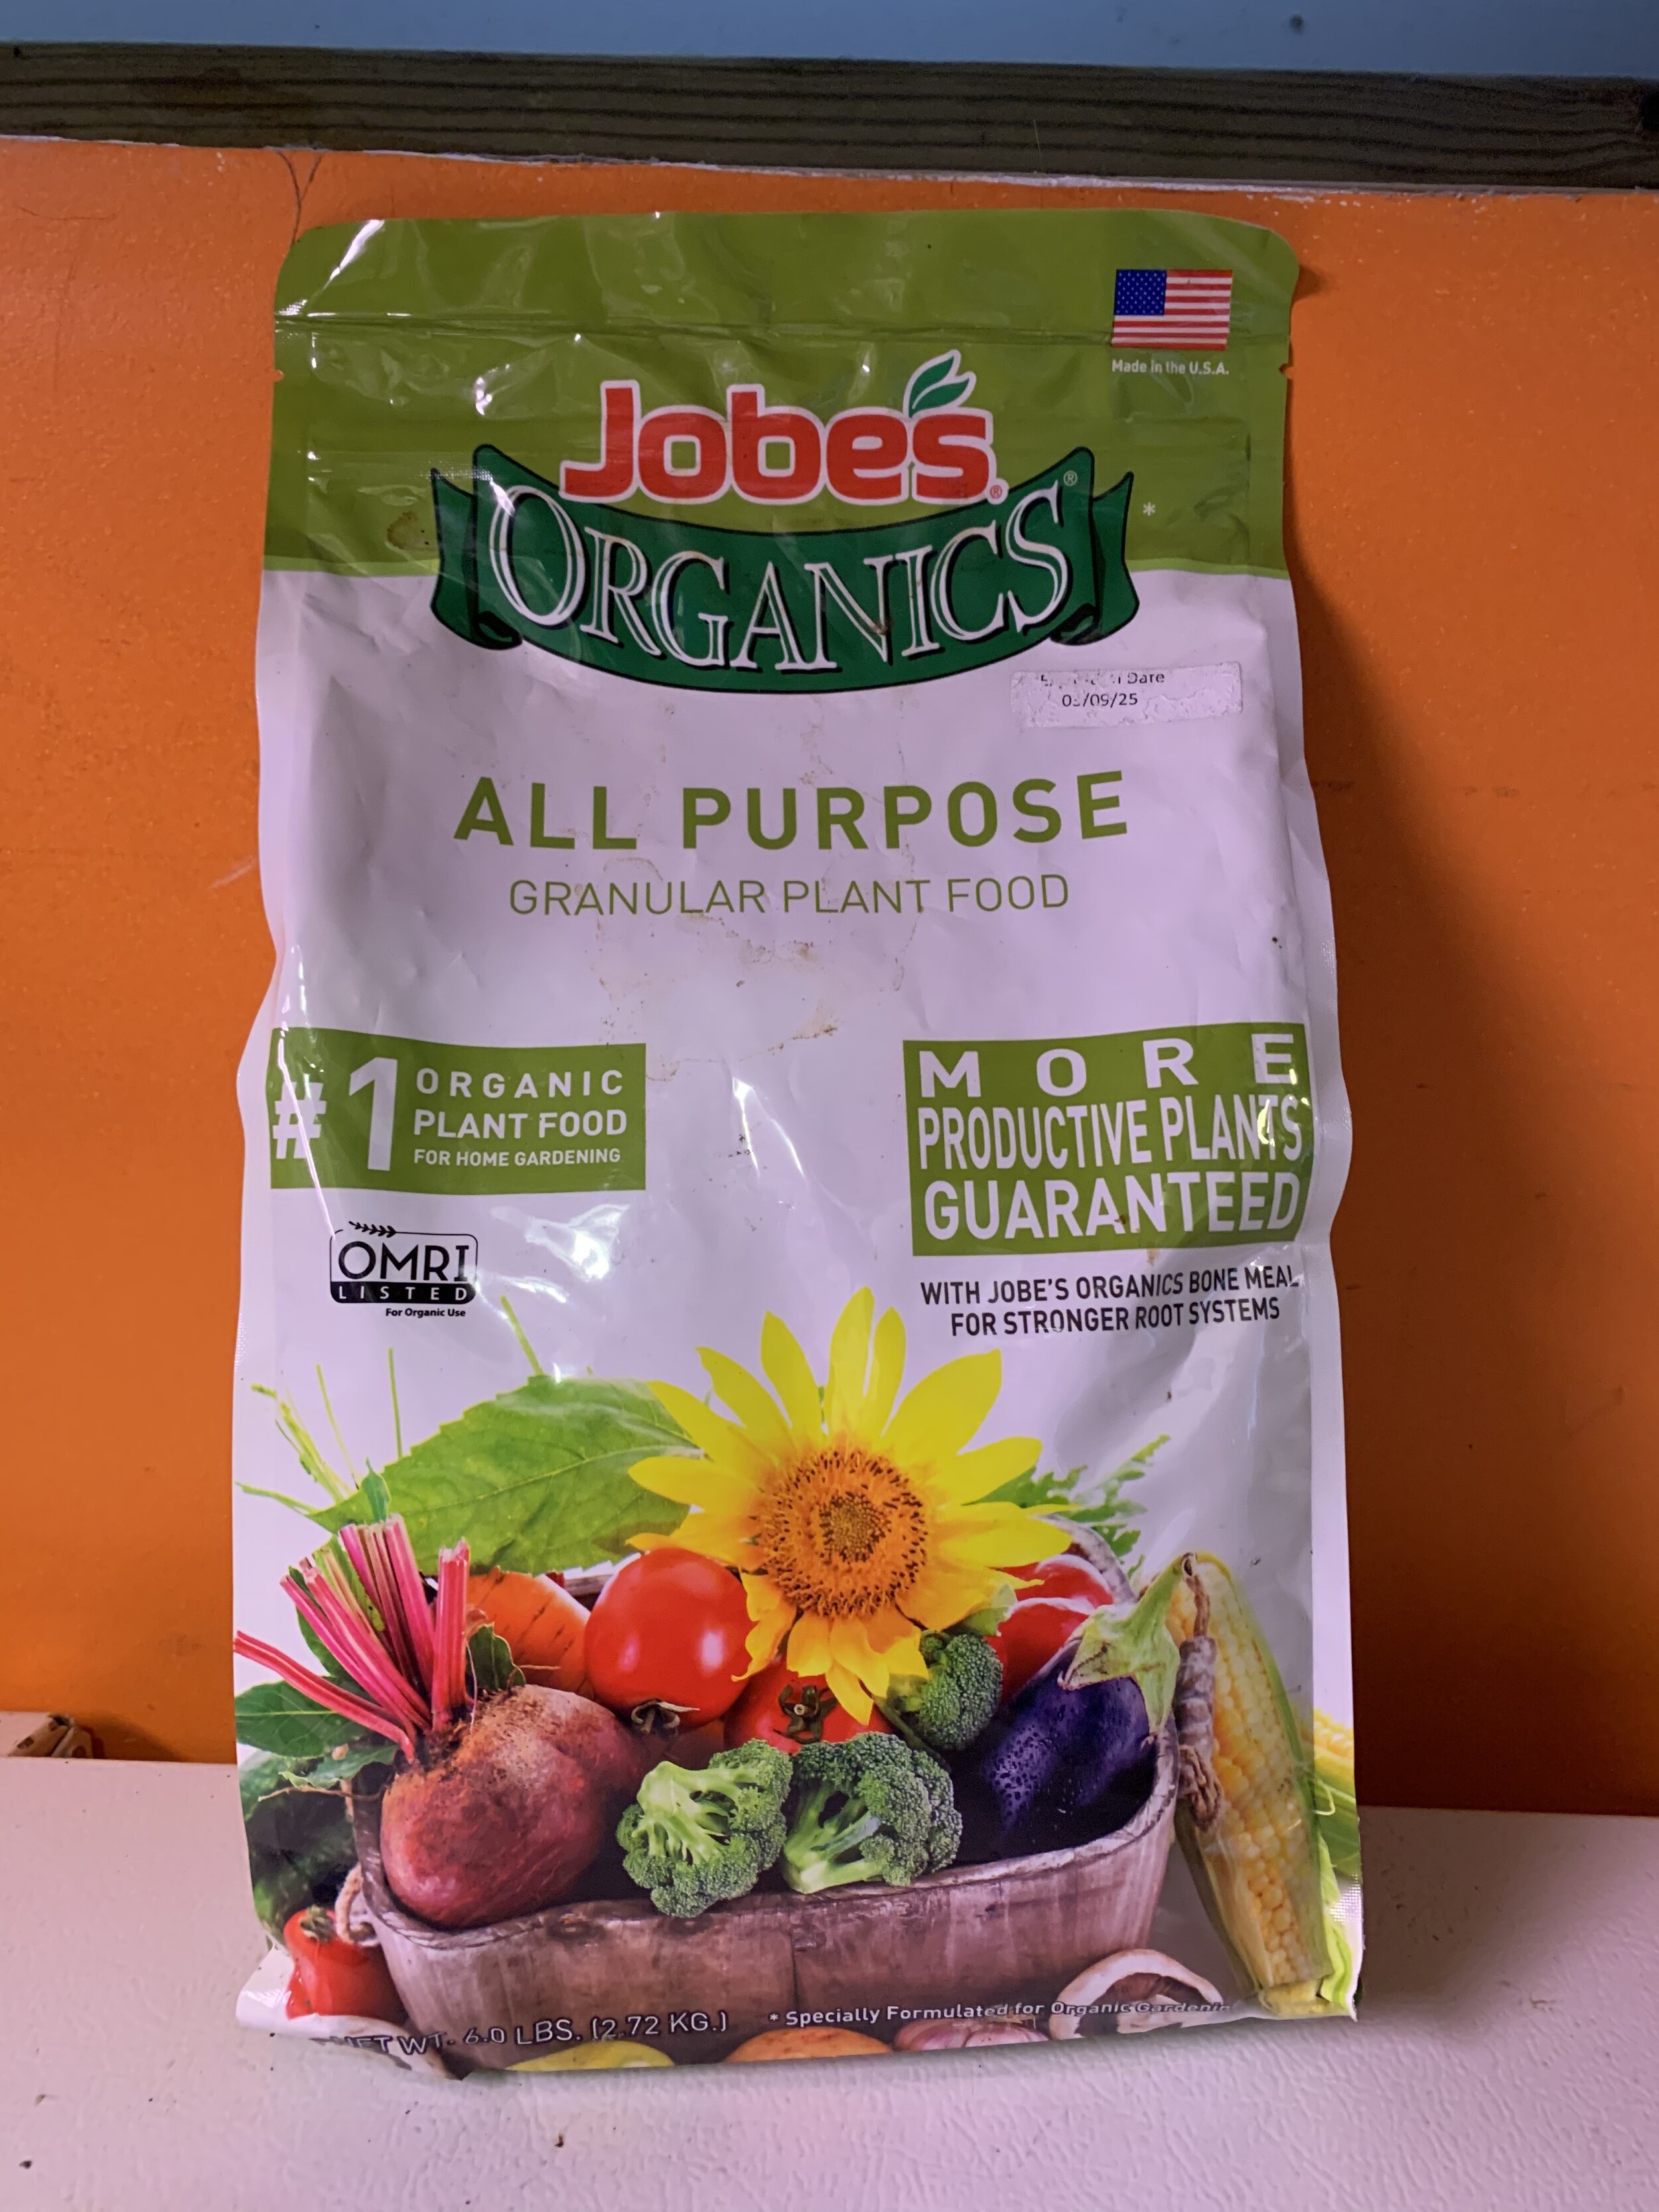
Jobe’s All Purpose Granular Plant Food. 6 lbs for $10.98. This will last multiple mixes as we only need a smidgen compared to the other ingredients. Often, available plant foods contain animal byproducts like bone meal and feather meal including this brand. I was unable to find one at the BB store but if that’s a problem for you, there are options out there.
I added 1/8 Part of this to my mix

Sta-Green Horticultural Perlite. $4.48 for 8 quarts. This will also last a while. I added Perlite and maybe should have added Vermiculite since it holds water better? I have bags of each and actually ended up sprinkling Vermiculite on top of the seeds after I put them on the blocks. I don’t know if that was a good idea yet or not. Garden Betty has a helpful post on the difference between Perlite and Vermiculite. I was wondering.
I used __ parts of this in my mix.

We happen to have a handy set of stainless bowls in a variety of sizes. I decided the largest of these would be my 1 Part and the smallest my 1/8th part. This was a totally arbitrary decision and they don’t have sizes on the bottom so you’ll have to make your own arbitrary decision on what containers to use.
So here’s a breakdown of the recipe:
4 Parts Topsoil
3 Parts Compost
2 Parts Perlite (or Vermiculite)
1/8 Part Plant Food

Combine and mix thoroughly. I used a plastic bin with a tight fitting lid and once I got everything in there I lidded up and shook it until it seemed thoroughly mixed. It worked great! I didn’t open it until the dust had died down.

The dry mixing is the easy part.
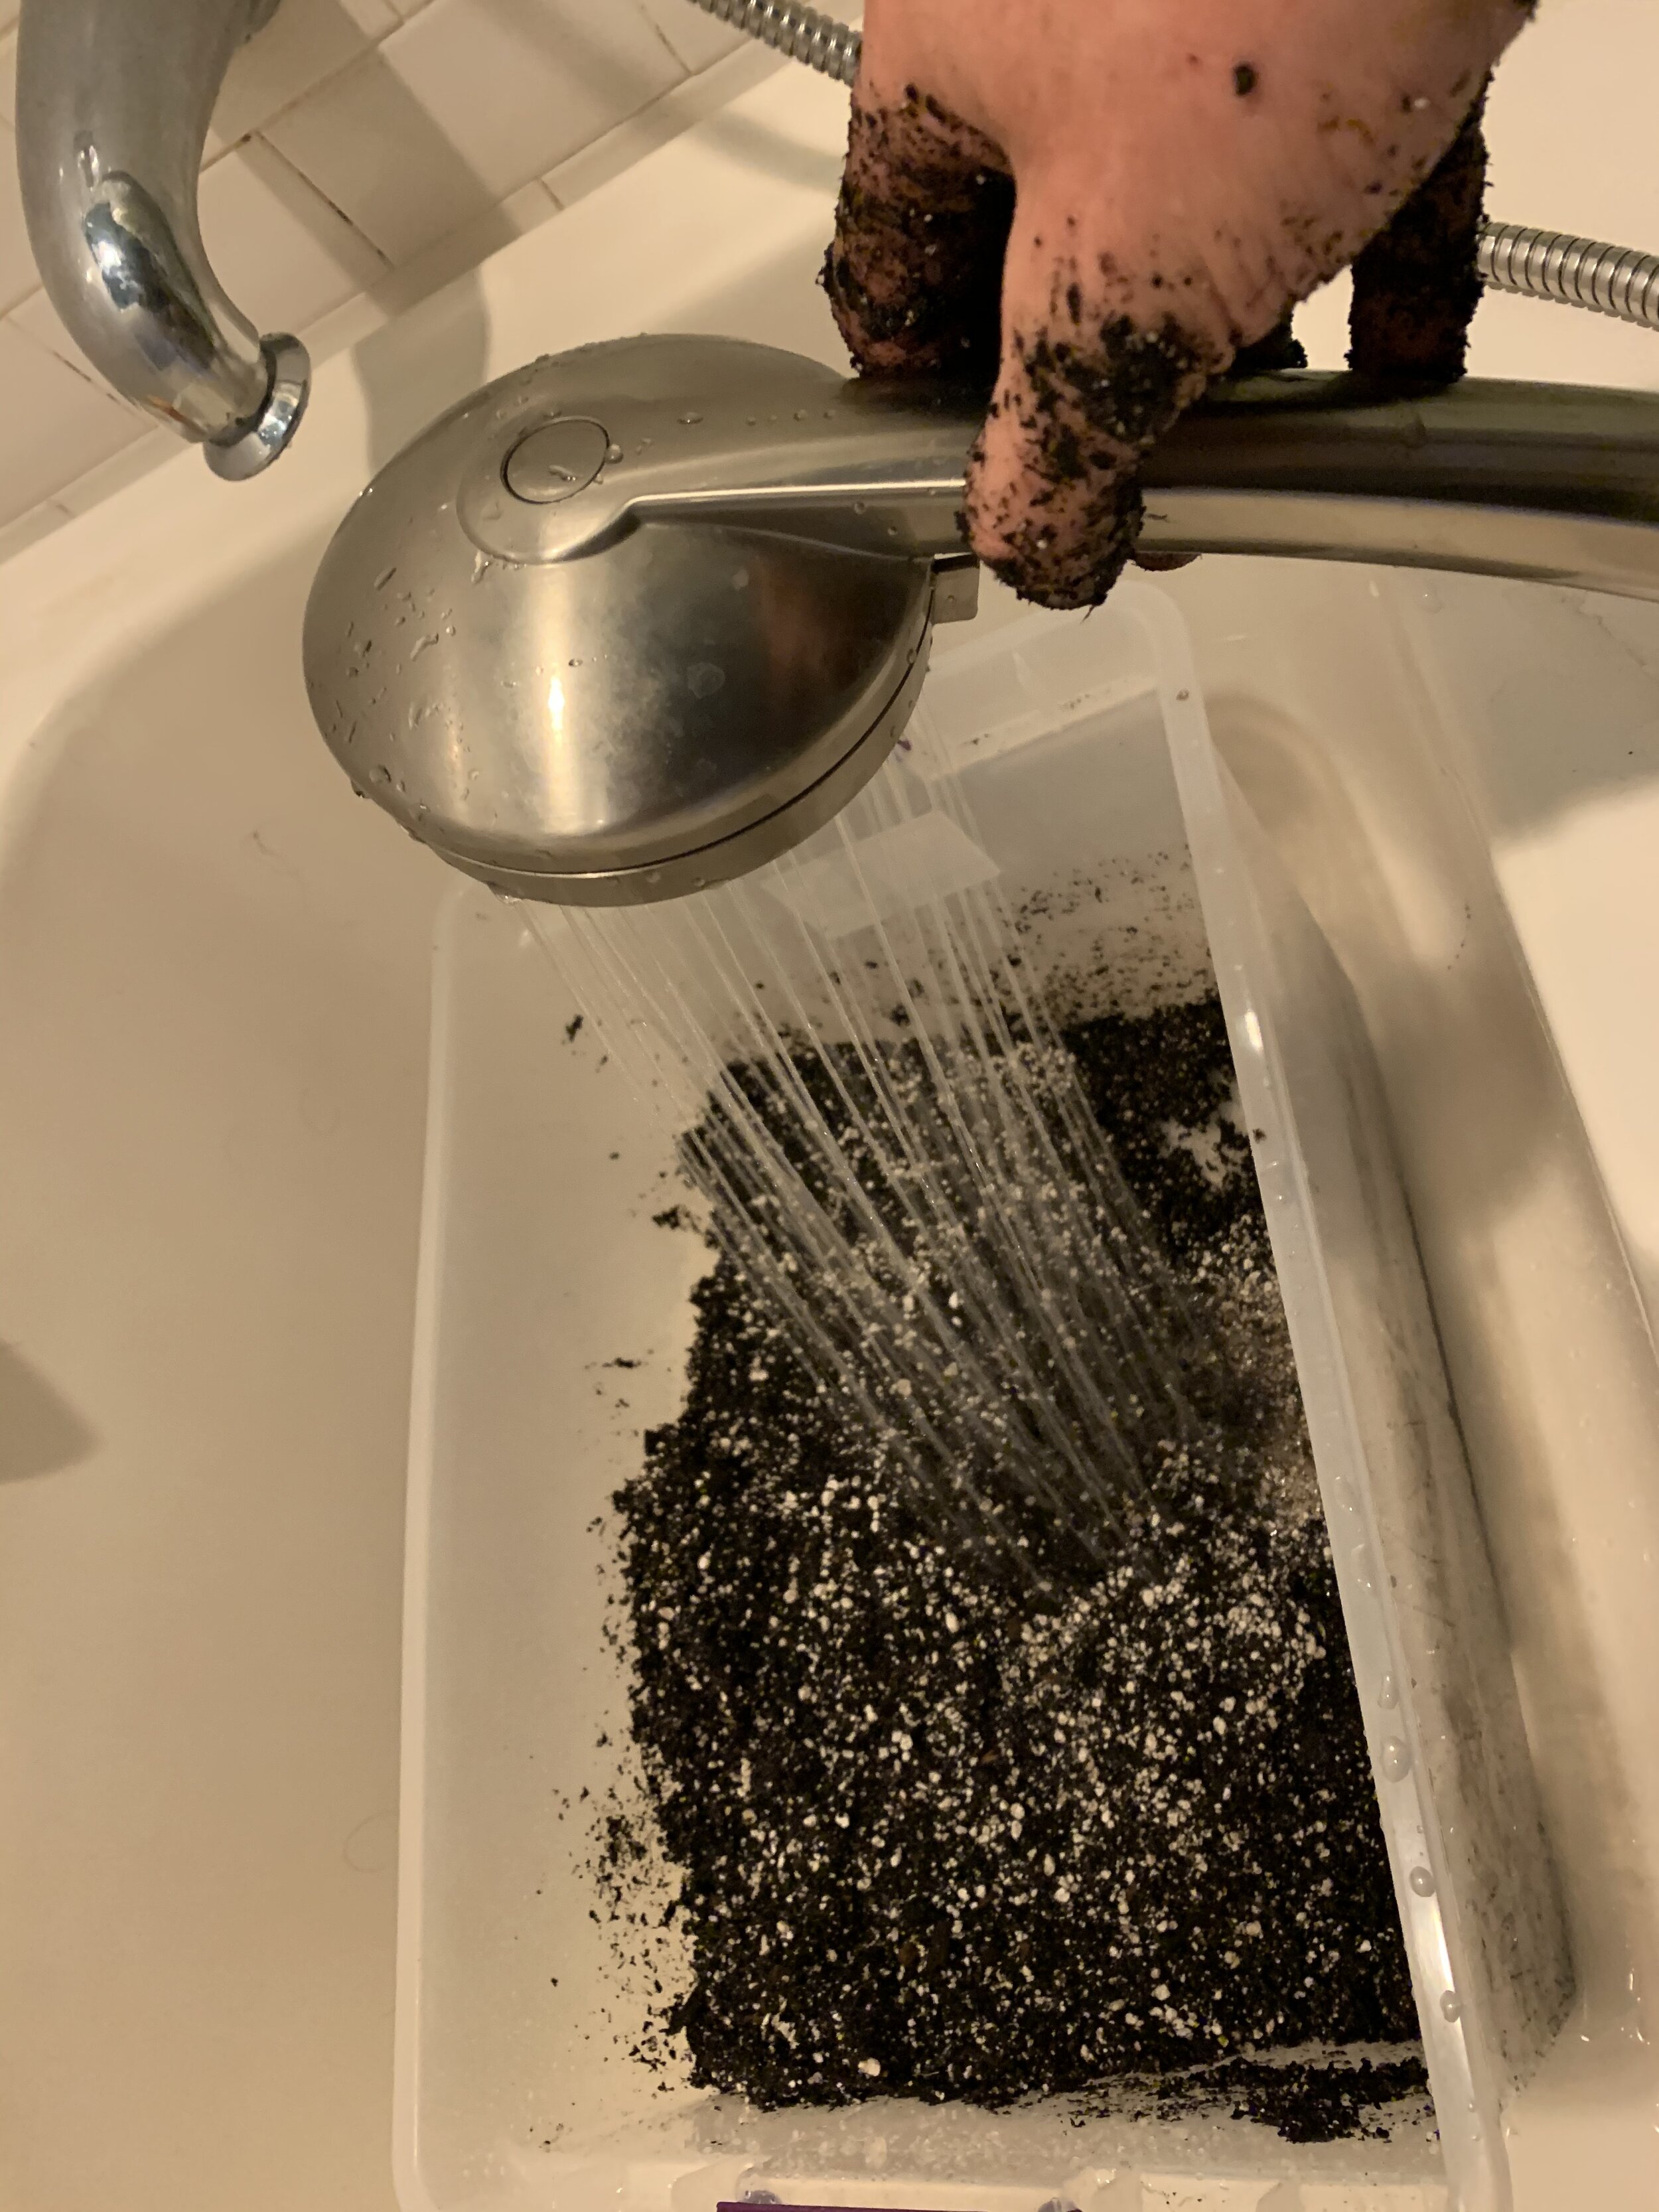
Just add water, a lot of water.

Squish and mix by hand. Sort of like making bread. It should soak all the water up. You don't want too much water sitting around in the bottom that doesn’t get soaked up so add a bit at a time. Carefully drain any excess.

When you can squeeze out a shape and it sticks together you know you’re there.

Time to start blocking. This took some trial and error because the soil does want to fall out if you don’t get enough up in there to fully compress itself. I ended up pushing down repeatedly into the deeper soil and bringing it up the side without lifting it. This let me check it from the bottom and poke a finger on each cell to make sure it was fully compacted.
And I should note that I didn’t start with the 20 blocker, I started with the 5. I don’t think I need a large production of blocks and starts so thought I’d go big first and see if this plan works.
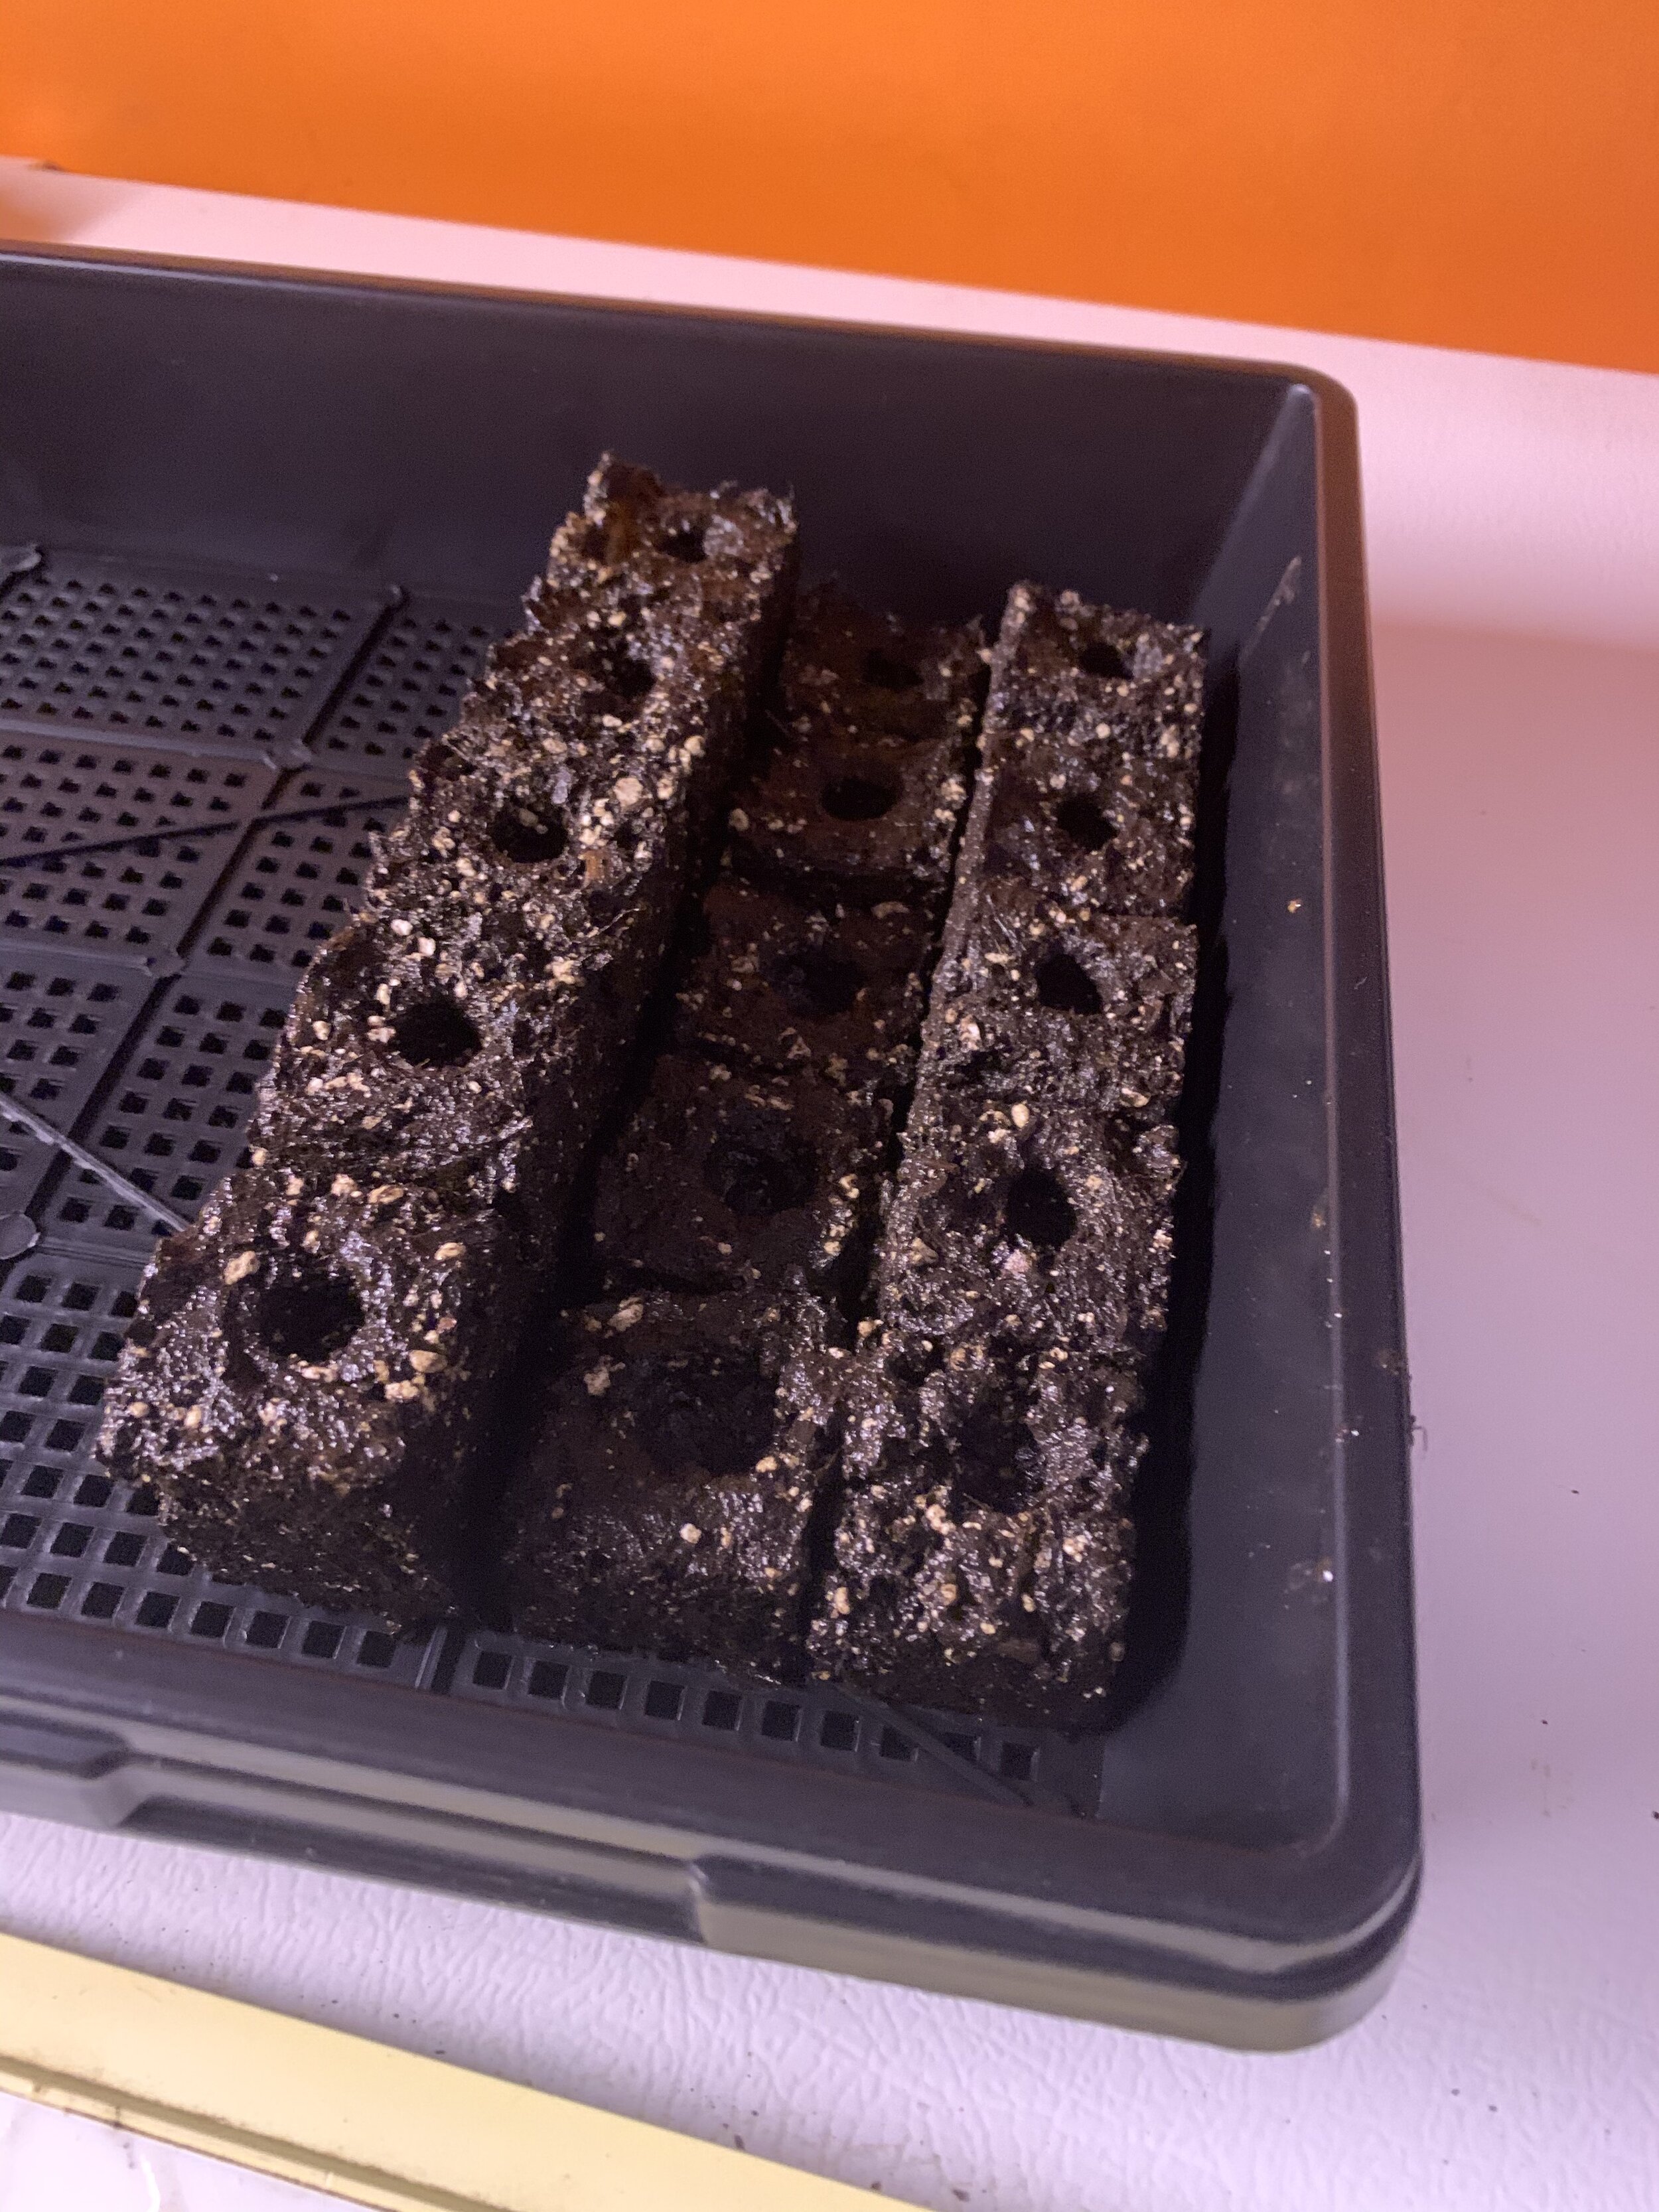
My first block rows had to be redone but you can see how it took me a couple tries to get it right.

Gotta get that blocker stuffed full o’dirt.

Don’t you just want to pop one in your mouth?
Plant some seeds in those holes. I covered them with a small layer of vermiculite (wouldn’t do that again) and let them bask in their new little home to become healthy, delicious plant things to be replanted in the garden.
Then, I learned some lessons…
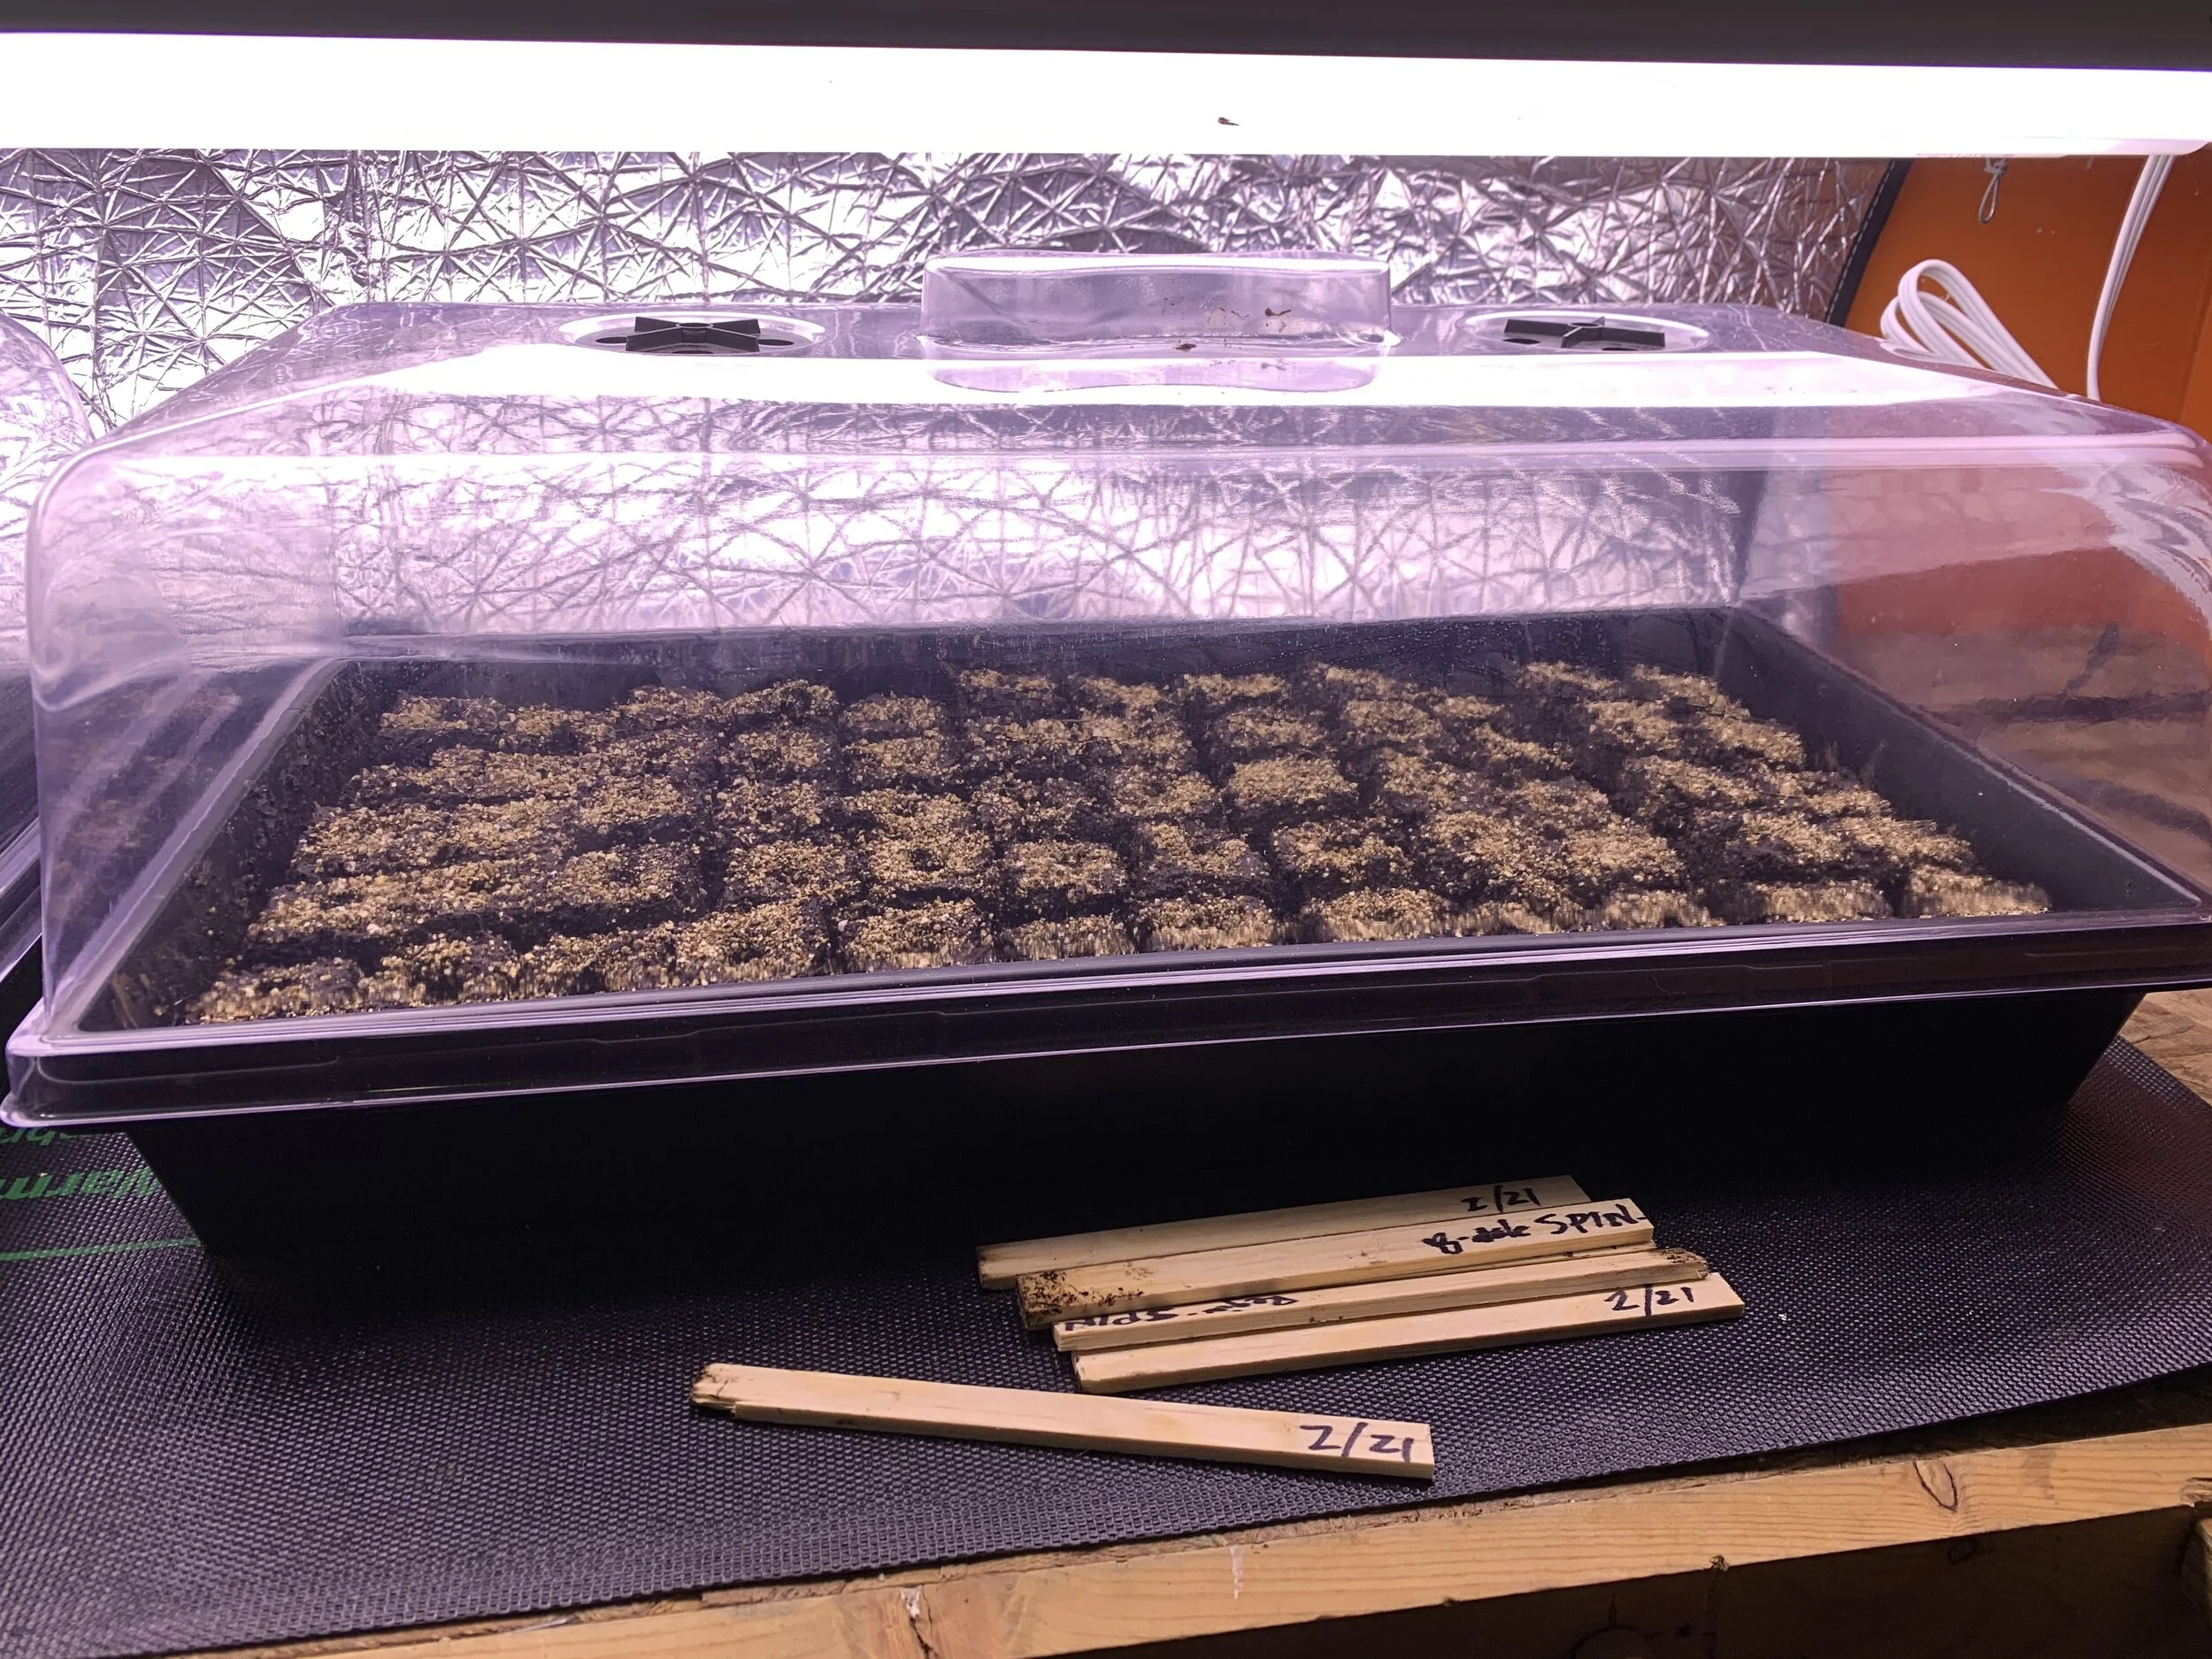
A few weeks later:
NOW, let’s get to the lessons I learned with this project.
Lesson #1: These blocks don’t water themselves. What?! Yeah, you have to keep them watered. The really great thing about the trays I procured (see above) is that they will nearly water themselves, BUT, you have to put the water in there first, yourself. Fill it up underneath and they’ll sip at it as they need it. You only have to do that about once a week but you have to keep an eye on it. I did this important step one time and then thought it would take care of itself. It won’t. These are plant babies. Babies don’t take care of themselves. One of the parts that came with the trays was a “greenhouse” lid kind of thing with holes on top that allow air to escape. I closed those off and it got super humid in there. Every time I opened the lid to peer in it would leak down the sides and make a watery mess. So, I thought they were watering themselves with this condensation. Not so fast mister.
Lesson #2: Those holes in the blocks can be adjusted or made non-existent with little attachments that come with the blocker. The holes I made will fit one of the little blocks if I had started with the 20 block maker.
Lesson #3: Heat mats make it more humid but dry up the water even faster. This was the first time I used this heat mat. It gets pretty warm and I think it is only to be used for germination. I may not bother next time. Or do one on the mat and one off the mat and see if there’s a difference.
Lesson #4: The left over soil will get super gross if you don’t use it up. I had a lot of left overs. You might imagine what manure and dirt and fertilizer will do in a covered plastic container. Let’s leave it at that. Use it up or lose into the compost. I’ll personally make a lot less next time.

Lesson #5: Try it again! I was successful (amazingly) in using the same blocks again for some brassica seeds. And they aren’t dead yet!
Lesson #6: Really the ultimate question is “would I do it again?”. I was rarin’ to go back then in mid-February. It was gray and cold. It is now mid-April. It’s sunny and getting warmer and things are blooming all over the place. I’ve now planted things in the garden and have lettuce going in the garden that I started a month ago outside under some glass (my modified/reclaimed/cheap cold frame will be a later post) begging the question, why would I start seeds so early inside? Especially lettuce? Well, it could be grown fully inside and not replanted outside for a very small salad. An indoor, edible garden? Maybe.
Although, I have bought happy, healthy starts from the farmer’s market, our local co-op store, and Seedleaf, some for as cheap as $1. They did the work for me already! And they are already growing into big, healthy plants in the garden!
I like the idea of being self-sustaining and knowing how to do these things so it’s worth the experiment. Come February 2022, I’ll probably get the itch to try it again. I’m definitely behind on starting tomatoes and peppers so I’ll be on the lookout for some healthy plants.
But, now I know how to mix some soil block soil that stays together and seems to grow plants. I also might compare soil blocks to plastic cell trays with simple potting soil in them and see how things differ. Always something new to learn.
Meanwhile, I am growing some things in soil blocks! I’ll see how they do and get back here with an update.
Happy gardening and thanks for reading!